
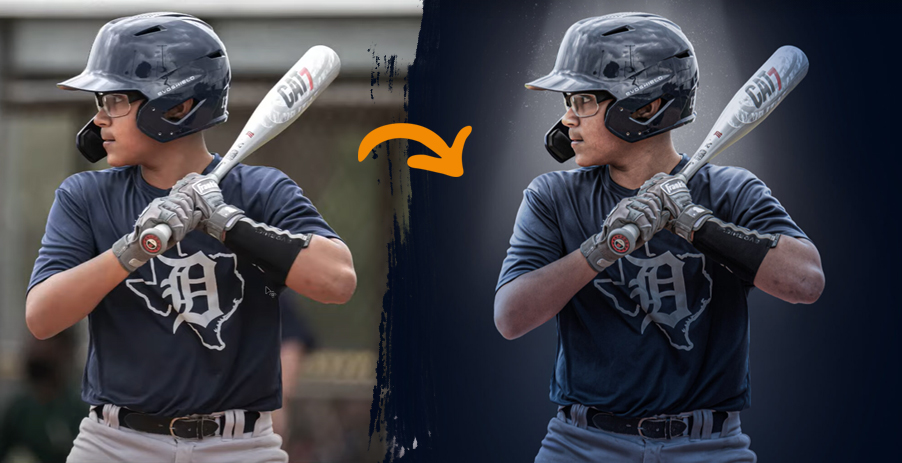
In this tutorial I will show you how to create a player spotlight graphic using only an image, brushes, and the default toolset in Photoshop. No fancy actions, overlays or backgrounds needed. The only things you need are Photoshop, an image you want to use, and some brushes you can easily find on the internet. At the end of this tutorial is a Video that walks through the entire process. You will also find at the end of this tutorial, the original image and links to the brushes used in the tutorial. You can use them to follow along with this tutorial if it helps.
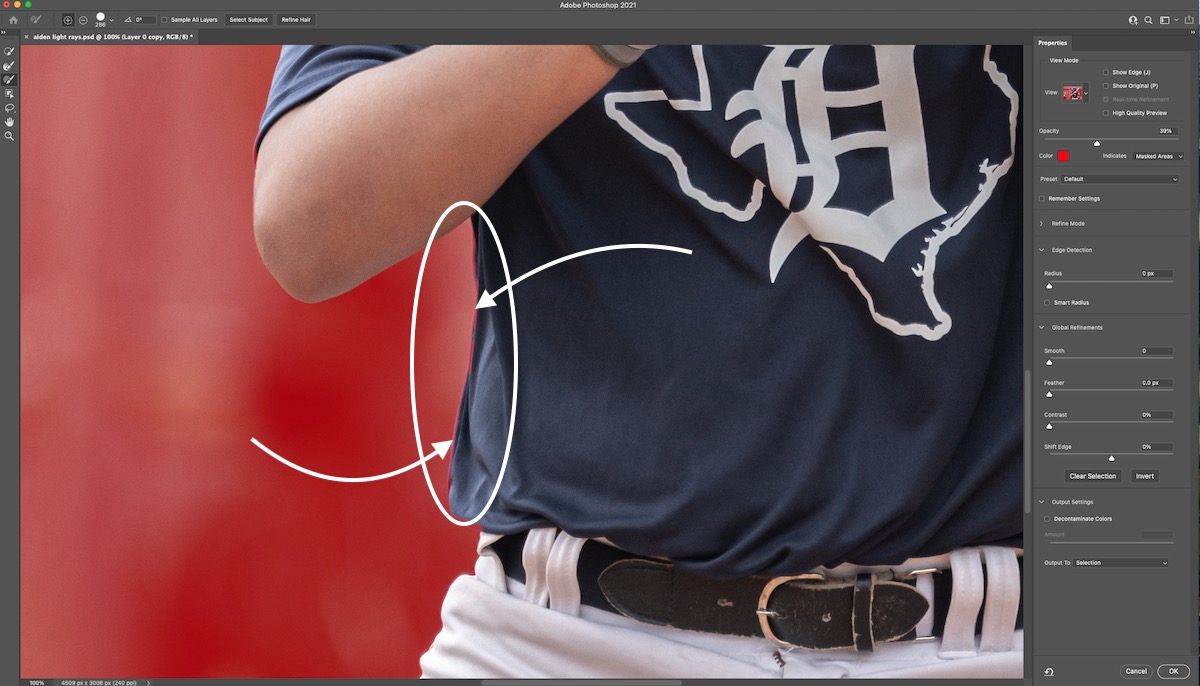
 The Select and Mask Workspace is where we are going to clean things up. Zoom in around the edges and find the spots where the Object Selection tool wasn’t precise. Once you have cleaned everything up and are happy, you will need to choose the format you want to output to. At the bottom of the Properties panel you will see the Output Settings sections. In the Output To dropdown select either New Layer or New Layer with Layer Mask -either will work. I usually just select New Layer as the Output Setting.
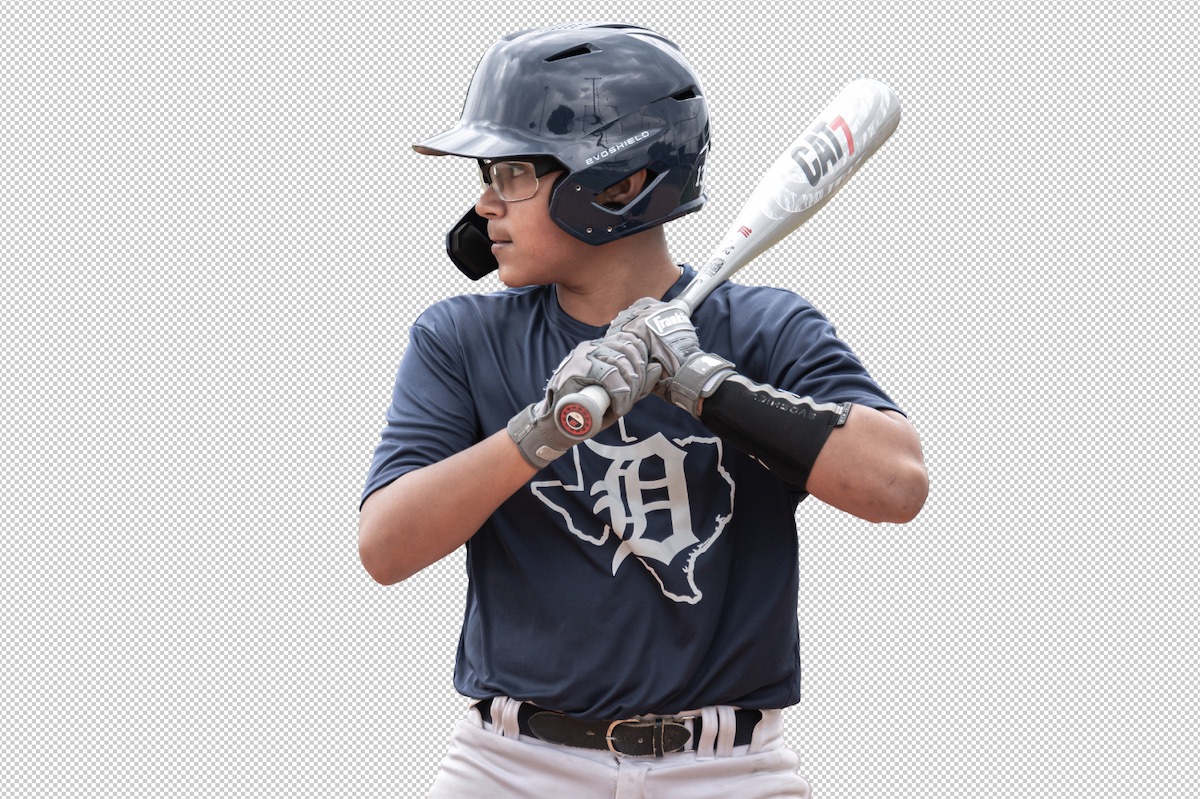
 Now we need to center the image on the canvas. You can drag it where you want or you can use the options panel at the top of the screen to center the image on the canvas. This will likely depend on the look you are going for.
 Let’s create our background now. Click on the layer just below the player and select the Insert New Layer icon at the bottom of the Layers panel or press the Shift+Ctrl+N keys (works the same on PC or Mac). Once you have the new layer created we will rename the layer to ‘background’. Always a good idea to get into the habit of naming your layers.
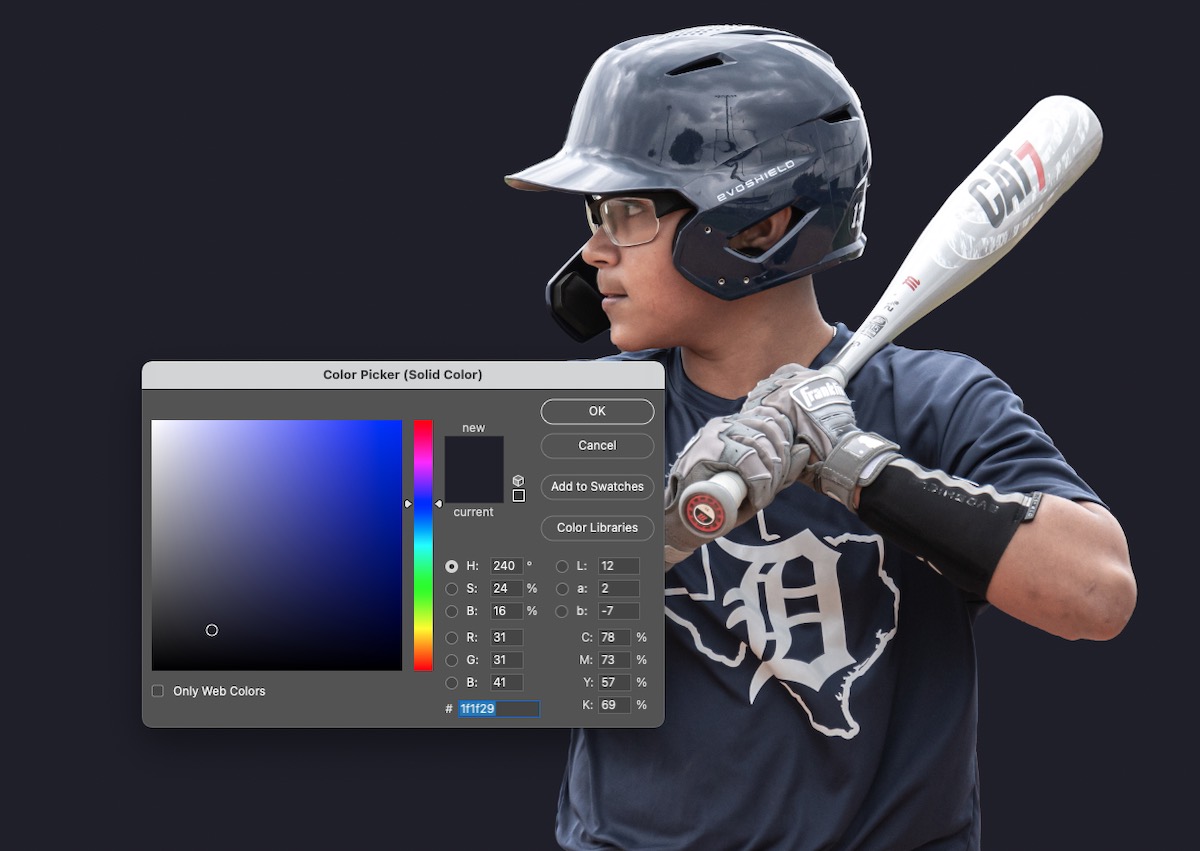
In this example, we want our background to be a blue color similar to the player’s jersey color. Double click the Rectangle Thumbnail on the layer to bring up the Color Picker window. You can use the Eye Dropper tool from here to sample a color from the jersey or you can simply use the Color Picker to choose your color. Press ok when you are done.
Let’s create our background now. Click on the layer just below the player and select the Insert New Layer icon at the bottom of the Layers panel or press the Shift+Ctrl+N keys (works the same on PC or Mac). Once you have the new layer created we will rename the layer to ‘background’. Always a good idea to get into the habit of naming your layers.
In this example, we want our background to be a blue color similar to the player’s jersey color. Double click the Rectangle Thumbnail on the layer to bring up the Color Picker window. You can use the Eye Dropper tool from here to sample a color from the jersey or you can simply use the Color Picker to choose your color. Press ok when you are done.
 Something I didn’t do in the video tutorial that I should have, is to convert the Player layer to a Smart Object. Doing this, allows us to make non-destructive edits to the player. In the video, I just ran the Camera Raw Filter on the player moved on. So take that into consideration.
That being said, let’s convert the Player layer into a Smart Object by right clicking on the layer (PC) or Ctl+Click (Mac) and choosing Convert to Smart Object from the context menu.
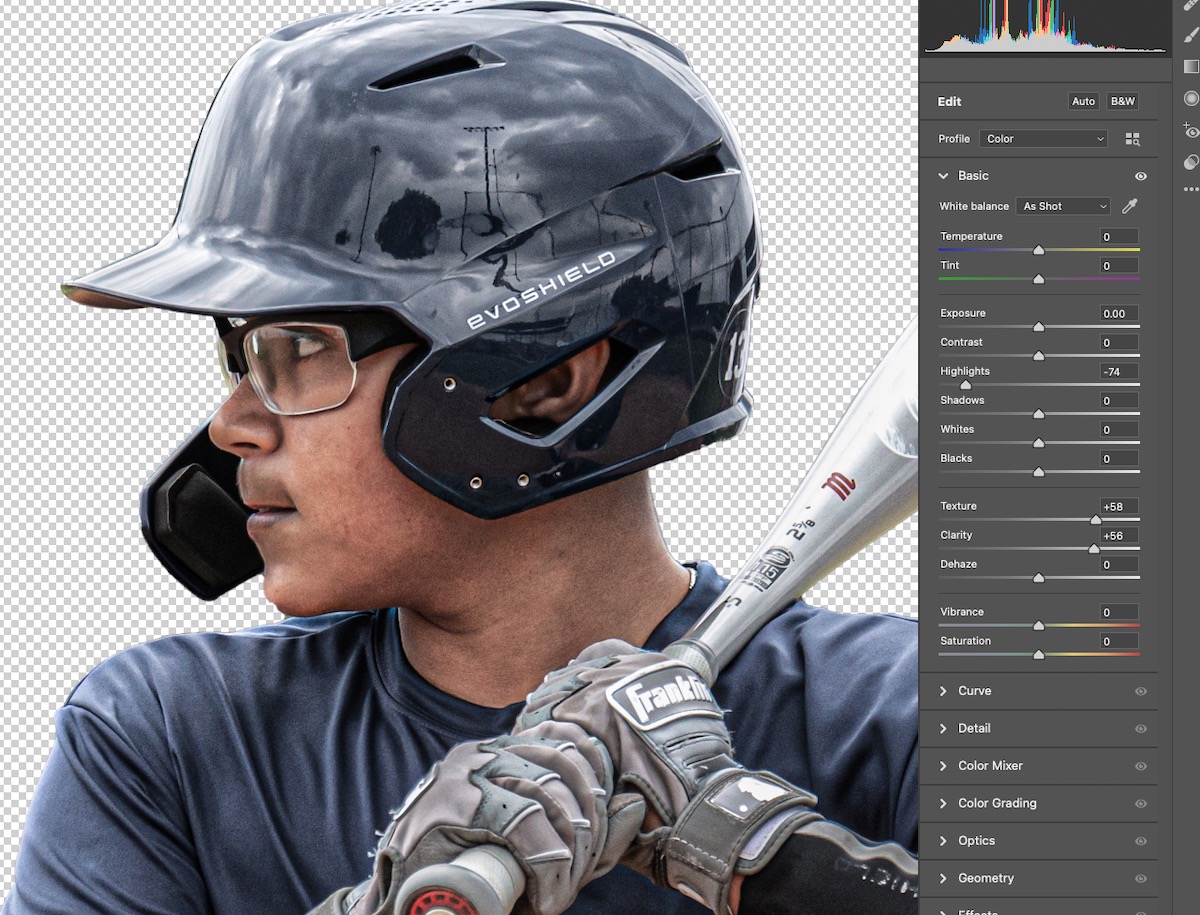
Now, from the main menu, choose Filter > Camera Raw Filter to enter the Camera Raw workspace. This workspace is very similar to the functionality of the Light Room. We are using the Camera Raw Filter to make our subject more gritty feeling and to get the different textures and shadows to pop more. In this image, I will drop the Highlights and increase the Texture and Clarity. These settings will be different based on the image you are working with and the results you are looking for. Don’t be afraid to experiment here.
Something I didn’t do in the video tutorial that I should have, is to convert the Player layer to a Smart Object. Doing this, allows us to make non-destructive edits to the player. In the video, I just ran the Camera Raw Filter on the player moved on. So take that into consideration.
That being said, let’s convert the Player layer into a Smart Object by right clicking on the layer (PC) or Ctl+Click (Mac) and choosing Convert to Smart Object from the context menu.
Now, from the main menu, choose Filter > Camera Raw Filter to enter the Camera Raw workspace. This workspace is very similar to the functionality of the Light Room. We are using the Camera Raw Filter to make our subject more gritty feeling and to get the different textures and shadows to pop more. In this image, I will drop the Highlights and increase the Texture and Clarity. These settings will be different based on the image you are working with and the results you are looking for. Don’t be afraid to experiment here.
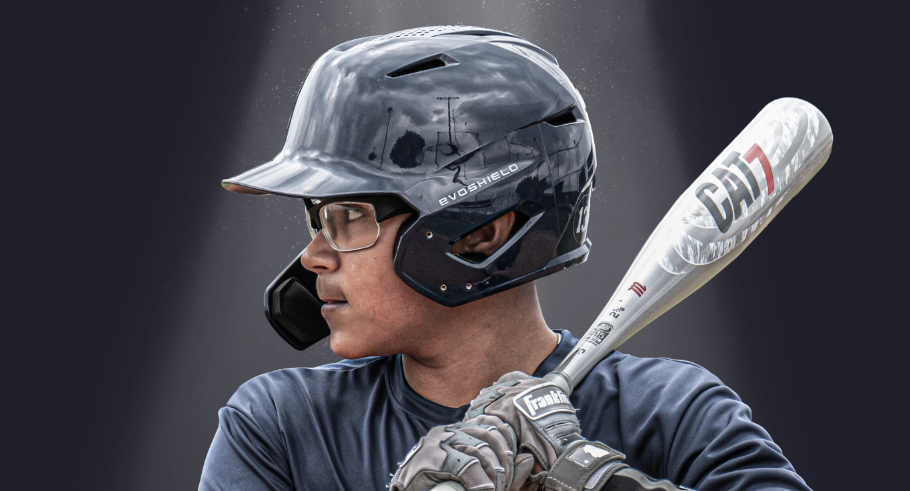
 It’s time to add our light rays behind the player. There are different ways to accomplish this part. We are going to use a custom brush to create the Light Ray. Some of you don’t have these brushes but might have an overlay that you can use instead. If you don’t have either, you can experiment with the rectangle tool, adjust the shape, and use some masking and feathering and can get pretty similar results. In the tutorial video, I didn’t like the first light ray brush I used so I later removed it and added a new one.
So, click on the rectangle background layer and add a new layer above it. Use you brush tool to create a light ray behind the player or insert your overlay and make your adjustments. If you want to change the color of the light rays to match the jersey and background, then add a Hue/Saturation adjustment layer above the light ray layer. Right click (PC) on the Adjustment Layer or Ctl+Click (Mac) and choose Create Clipping Mask from the context menu. A clipped layer will only be visible within the boundaries of the layer it’s clipped into, also known as the “base” layer. A layer will become underlined, indicating that it is a base layer, once a separate layer is clipped into it. Once we have the Hue/Saturation layer setup as a clipping mask to the light ray layer, we can use it to adjust the color of the light ray.
Click on the the Hue/Saturation Layer, then in the Properties panel, check the box that says Colorize. Now adjust the sliders for Hue, Saturation and Lightness until you are satisfied.
It’s time to add our light rays behind the player. There are different ways to accomplish this part. We are going to use a custom brush to create the Light Ray. Some of you don’t have these brushes but might have an overlay that you can use instead. If you don’t have either, you can experiment with the rectangle tool, adjust the shape, and use some masking and feathering and can get pretty similar results. In the tutorial video, I didn’t like the first light ray brush I used so I later removed it and added a new one.
So, click on the rectangle background layer and add a new layer above it. Use you brush tool to create a light ray behind the player or insert your overlay and make your adjustments. If you want to change the color of the light rays to match the jersey and background, then add a Hue/Saturation adjustment layer above the light ray layer. Right click (PC) on the Adjustment Layer or Ctl+Click (Mac) and choose Create Clipping Mask from the context menu. A clipped layer will only be visible within the boundaries of the layer it’s clipped into, also known as the “base” layer. A layer will become underlined, indicating that it is a base layer, once a separate layer is clipped into it. Once we have the Hue/Saturation layer setup as a clipping mask to the light ray layer, we can use it to adjust the color of the light ray.
Click on the the Hue/Saturation Layer, then in the Properties panel, check the box that says Colorize. Now adjust the sliders for Hue, Saturation and Lightness until you are satisfied.
 Now that we have the light rays in place behind the player, let’s add some dust particles. We are going to use the same process we did with the light rays and use a custom brush. Add a new layer above the Hue/Saturation layer we just added. Rename this layer to dust. Similar to the light ray layer, we’ll brush on our dust or insert a dust overlay. Make any adjustments necessary until you achieve the desired look. In the tutorial video, I used the eraser tool to remove some of the dust that I brushed on just to clean it up a bit.
 After you are done with the dust layer, let’s add a new layer above the dust layer and behind the player layer. Rename this layer ellipse. We are going to use the Ellipse tool from the Tool Bar and draw an ellipse. Hold the shift key while drawing the ellipse and it will keep it as a perfect circle instead of stretching it into an oblong shape. Once you have the ellipse drawn, make sure it’s somewhat centered between the shoulders, and directly behind the neck area. You can always come back later and reposition the ellipse if need be.
 Once you have the ellipse positioned to where you like it, making sure the ellipse layer is still selected, choose the Masks icon from the Shape Properties section of the Properties Panel. Find the Feather option and move the slider to somewhere around 400. I set the feather on this to 421, but that number will be different based on the size of your image and the size of the ellipse you have drawn on the canvas. We are simply using the feathered ellipse to create and enhance the glowing effect behind the player. If the ellipse is too bright, simply reduce the opacity until you are happy. I reduced the opacity of this ellipse to 69%.
 I want to do the same thing on the lower half of the player. Easiest way to do this is to duplicate the ellipse layer you just created and drag it down until it’s just around the waste line of the player. I don’t want it as bright on the lower half of the player, so I’ve reduced the opacity of this ellipse to 51%. Based on your image, experiment with the opacity and the sizing of the ellipse until you are happy.
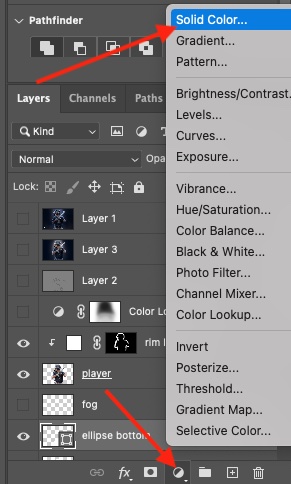
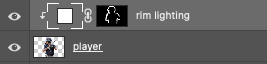
 For this next part, we are going to add some rim lighting to the player. Rim Lighting puts light around the edges of the subject and exposes any areas where the light would naturally fall. Since the lighting we are creating is mostly behind the upper body of our subject, we will concentrate most of the rim lighting in that area. There are multiple ways to add rim lighting. I’m going to show you a very simple way using a solid color adjustment layer and a mask.
Select your player layer. At the bottom of the layer panel, choose the Create New Fill or Adjustment Layer icon, then select the Solid Color option. Set the color to white and press ok.
For this next part, we are going to add some rim lighting to the player. Rim Lighting puts light around the edges of the subject and exposes any areas where the light would naturally fall. Since the lighting we are creating is mostly behind the upper body of our subject, we will concentrate most of the rim lighting in that area. There are multiple ways to add rim lighting. I’m going to show you a very simple way using a solid color adjustment layer and a mask.
Select your player layer. At the bottom of the layer panel, choose the Create New Fill or Adjustment Layer icon, then select the Solid Color option. Set the color to white and press ok.
 Now you entire screen is white. Notice the mask icon on the Adjustment Layer is white. So the first thing we want to do is select the Mask icon on the Adjustment Layer and invert it. To invert it, press CTL+I (PC) or CMD+I (Mac) and it will turn black. Remember this when dealing with Masks -“White reveals, Black conceals”.
We only want the changes we make on adjustment layer to to show on the player. So the next thing we want to do is right click on the Solid Color Adjustment Layer and choose the Create Clipping Mask option. Once this is done, you will see all of the icons on the Adjustment layer have shifted over and a down facing arrow has appeared.
Now we can begin to create our rim lighting. Make sure to select the mask icon on the Adjustment Layer. Then select your brush tool from the tool bar. You will want to use a soft round brush for this. Set the brush hardness to 0% and reduce the size of the brush. We only want to brush on just a little bit around the edges, so make sure the brush isn’t too large.
In order to expose the underlying color from the mask, we need to make sure the brush color is set to white. This will reveal the adjustment layer over the player as we brush it on.
Now you entire screen is white. Notice the mask icon on the Adjustment Layer is white. So the first thing we want to do is select the Mask icon on the Adjustment Layer and invert it. To invert it, press CTL+I (PC) or CMD+I (Mac) and it will turn black. Remember this when dealing with Masks -“White reveals, Black conceals”.
We only want the changes we make on adjustment layer to to show on the player. So the next thing we want to do is right click on the Solid Color Adjustment Layer and choose the Create Clipping Mask option. Once this is done, you will see all of the icons on the Adjustment layer have shifted over and a down facing arrow has appeared.
Now we can begin to create our rim lighting. Make sure to select the mask icon on the Adjustment Layer. Then select your brush tool from the tool bar. You will want to use a soft round brush for this. Set the brush hardness to 0% and reduce the size of the brush. We only want to brush on just a little bit around the edges, so make sure the brush isn’t too large.
In order to expose the underlying color from the mask, we need to make sure the brush color is set to white. This will reveal the adjustment layer over the player as we brush it on.
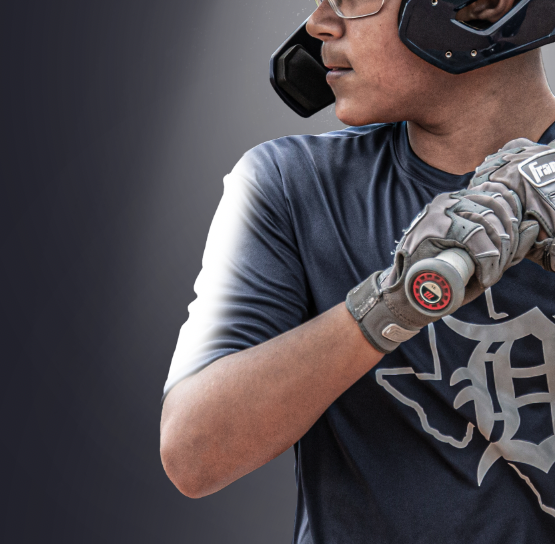 Look at the example above. I brushed over the player’s arm to expose the adjustment layer’s color. It is a solid white color and needs to be blended before we go over the entire image. To do this, let’s set the layer’s blend mode to Overlay. If it’s too bright, then reduce the opacity of the layer until you achieve the desired look. I reduced the opacity in this image to 58%.
Look at the image below. I used the brush and only painted over the edges of the player where the light would reach. I left the bat alone as it was already bright enough. If you find that you have painted too much in certain areas, just swap the brush color to black and paint over those areas. Then change the color back to white and try again.
Look at the example above. I brushed over the player’s arm to expose the adjustment layer’s color. It is a solid white color and needs to be blended before we go over the entire image. To do this, let’s set the layer’s blend mode to Overlay. If it’s too bright, then reduce the opacity of the layer until you achieve the desired look. I reduced the opacity in this image to 58%.
Look at the image below. I used the brush and only painted over the edges of the player where the light would reach. I left the bat alone as it was already bright enough. If you find that you have painted too much in certain areas, just swap the brush color to black and paint over those areas. Then change the color back to white and try again.
 For those of you not familiar with masking, looking at the image below. As you paint onto the adjustment layer, you will also see the areas you painted show on the mask icon.
 Next, for some added depth and detail, we’re going to go over the player and enhance all of the creases and folds in the uniform as well as the batting gloves. For this we’re going to use the Burn tool -but we’re going to use it in a non-destructive way.
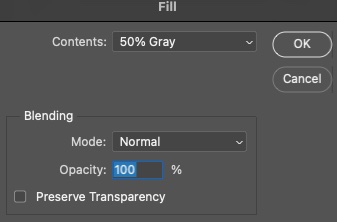
Create a new layer above the rim light adjustment layer. Then go to the main menu and choose Edit > Fill. The fill dialog will appear. set the Contents to 50% Gray and the Blending Mode to Normal and 100% then press OK. Now set the layer’s blending mode to Overlay. When you do this, you should no longer see the gray background color.
Now choose the Burn tool. Set the hardness to 0 and make the brush small -just big enough that it goes slightly covers the width of the creases. In the tool options set the Range to Shadows and the Exposure to 100%. Use the burn tool and brush over all of the creases and folds where there are shadows. This will intensify the shadows, creases and folds and help to make the subject pop off the screen.
Next, for some added depth and detail, we’re going to go over the player and enhance all of the creases and folds in the uniform as well as the batting gloves. For this we’re going to use the Burn tool -but we’re going to use it in a non-destructive way.
Create a new layer above the rim light adjustment layer. Then go to the main menu and choose Edit > Fill. The fill dialog will appear. set the Contents to 50% Gray and the Blending Mode to Normal and 100% then press OK. Now set the layer’s blending mode to Overlay. When you do this, you should no longer see the gray background color.
Now choose the Burn tool. Set the hardness to 0 and make the brush small -just big enough that it goes slightly covers the width of the creases. In the tool options set the Range to Shadows and the Exposure to 100%. Use the burn tool and brush over all of the creases and folds where there are shadows. This will intensify the shadows, creases and folds and help to make the subject pop off the screen.
 So for the final touch, chose the Create New Fill or Adjustment Layer icon at the bottom of the Layers panel. Choose Color Lookup from the list. Go up to the Properties panel and choose Moonlight.3DL from the first drop down box. This is going to create a deep blue color overlay on the image.
 I like the deep blue color here, but I want to lighten it up a bit on the player, but leave it visible everywhere else. So, click on the Mask Icon on the Color Lookup layer. Grab a soft round brush with a hardness of 0%, make sure the brush color is set to black, and reduce the opacity of the brush to around 46%. Now, use the brush to color over the player and slightly conceal the Color Lookup layer. If you remove too much, just change the brush color to black and paint back over the any areas you want to darken back up. Experiment with this until you are happy with the results.
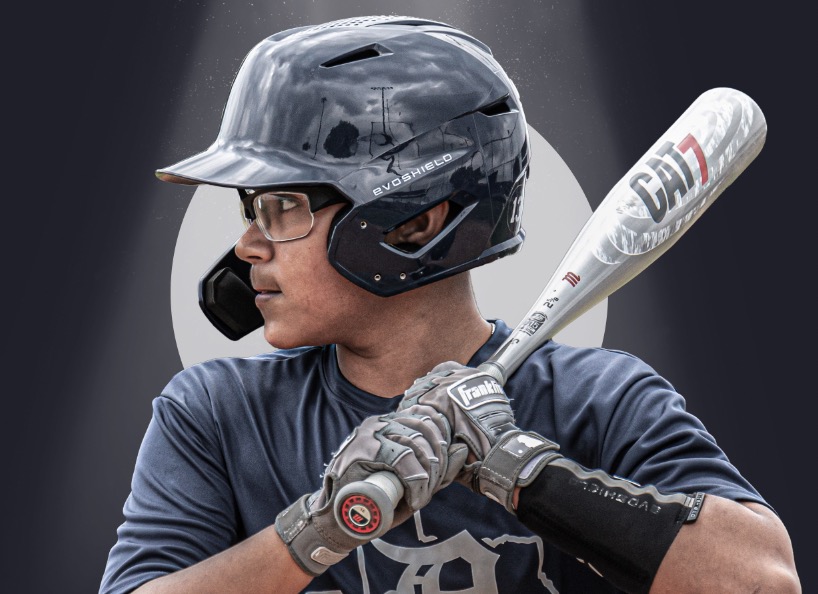
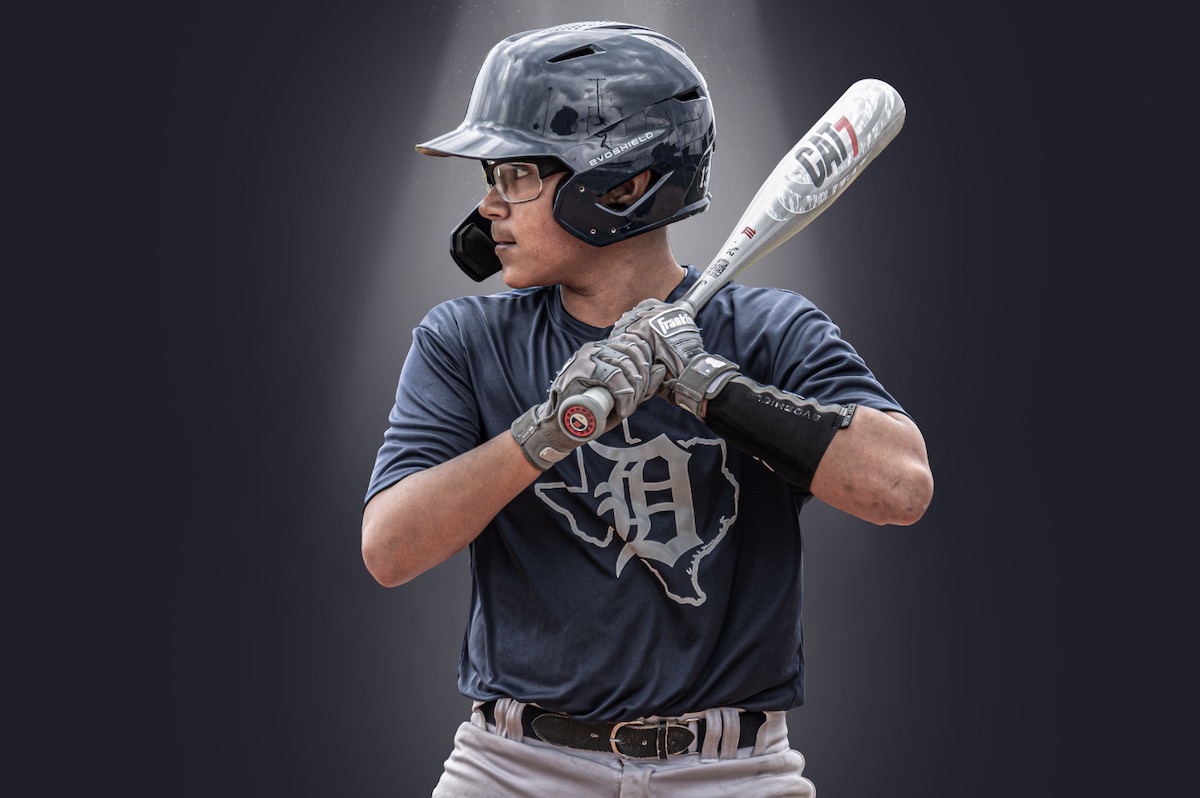
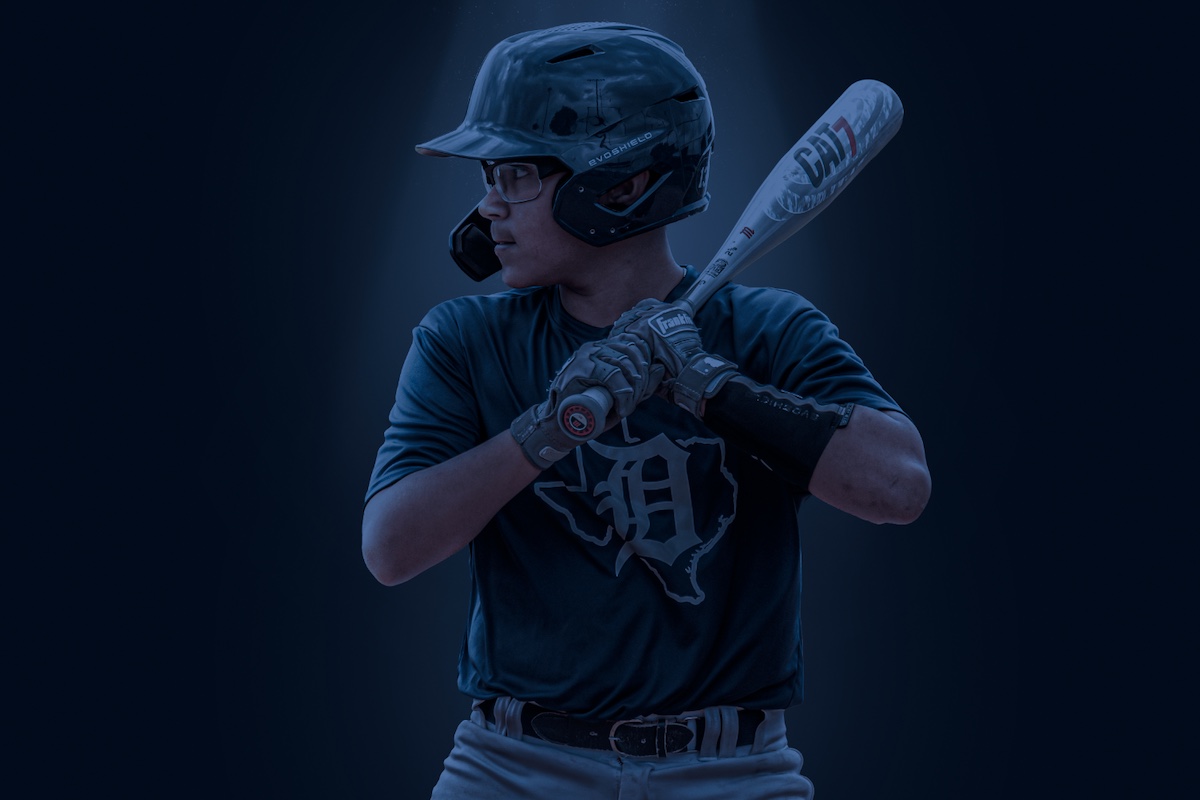
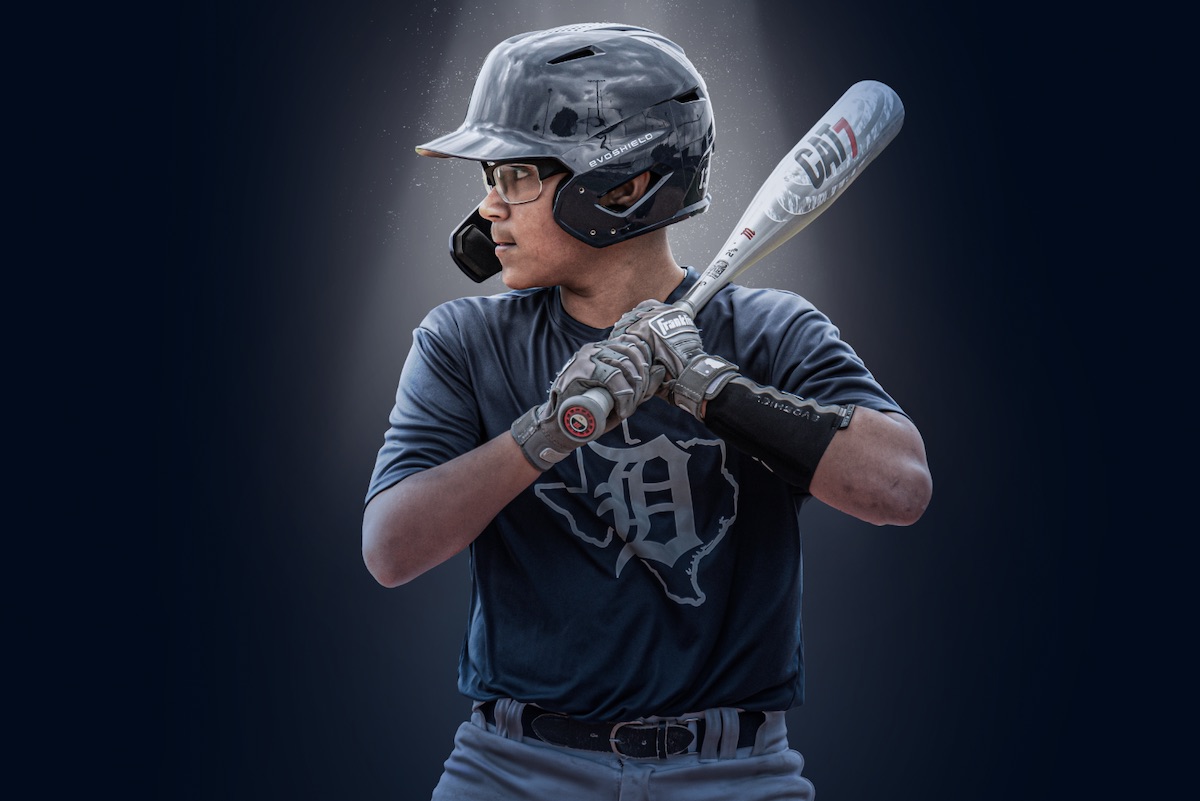
The final product is shown below:
I like the deep blue color here, but I want to lighten it up a bit on the player, but leave it visible everywhere else. So, click on the Mask Icon on the Color Lookup layer. Grab a soft round brush with a hardness of 0%, make sure the brush color is set to black, and reduce the opacity of the brush to around 46%. Now, use the brush to color over the player and slightly conceal the Color Lookup layer. If you remove too much, just change the brush color to black and paint back over the any areas you want to darken back up. Experiment with this until you are happy with the results.
The final product is shown below:
 Where can you find the brushes that I used?
Dust Brushes can be found here – 68 Dust Brushes
Light Ray Brushes can be found here – Light Ray Brushes
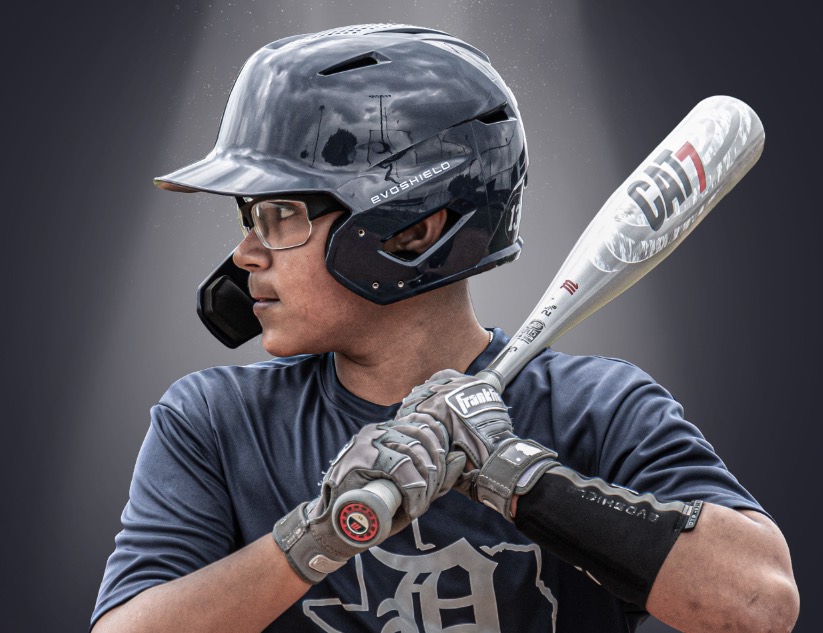
Original Photo in this tutorial can be downloaded here
Where can you find the brushes that I used?
Dust Brushes can be found here – 68 Dust Brushes
Light Ray Brushes can be found here – Light Ray Brushes
Original Photo in this tutorial can be downloaded here
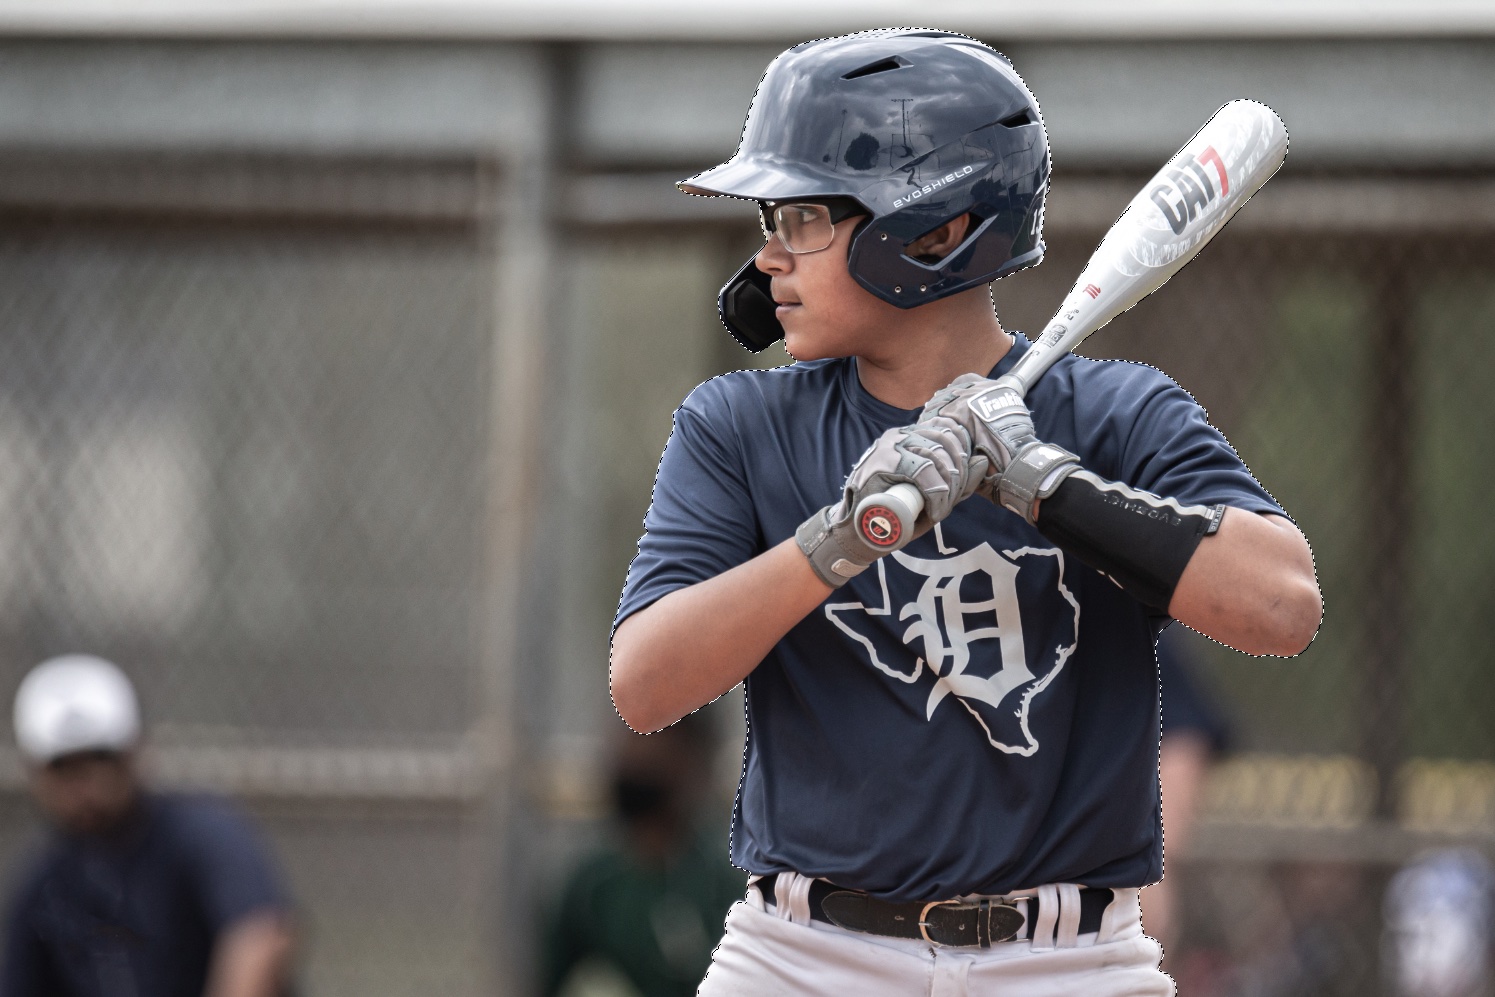
Let’s get started…
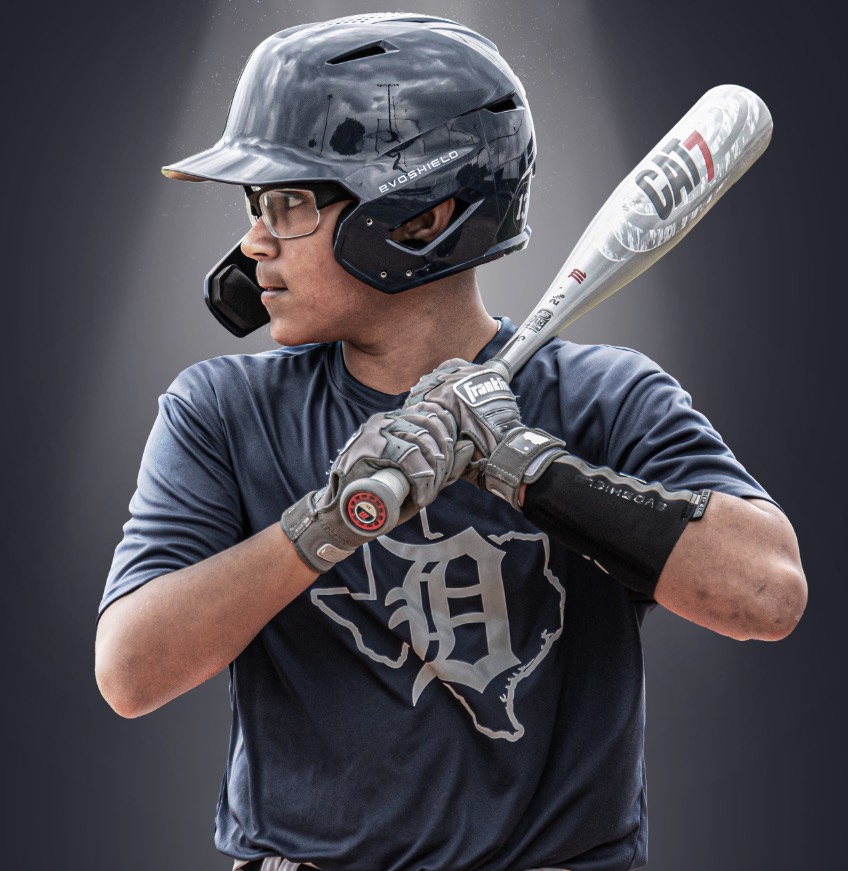
Open your image in Photoshop. From the toolbar, choose the Object Selection Tool, then from the Options Panel, choose the Select Subject button. You should now see the marching ants around your subject. Don’t worry if it’s not perfect -we’re going to clean everything up. Once your object has been selected, go back to the Options panel and choose the Select and Mask button to enter the Select and Mask Workspace.
The Select and Mask Workspace is where we are going to clean things up. Zoom in around the edges and find the spots where the Object Selection tool wasn’t precise. Once you have cleaned everything up and are happy, you will need to choose the format you want to output to. At the bottom of the Properties panel you will see the Output Settings sections. In the Output To dropdown select either New Layer or New Layer with Layer Mask -either will work. I usually just select New Layer as the Output Setting.
Now we need to center the image on the canvas. You can drag it where you want or you can use the options panel at the top of the screen to center the image on the canvas. This will likely depend on the look you are going for.
Let’s create our background now. Click on the layer just below the player and select the Insert New Layer icon at the bottom of the Layers panel or press the Shift+Ctrl+N keys (works the same on PC or Mac). Once you have the new layer created we will rename the layer to ‘background’. Always a good idea to get into the habit of naming your layers.
In this example, we want our background to be a blue color similar to the player’s jersey color. Double click the Rectangle Thumbnail on the layer to bring up the Color Picker window. You can use the Eye Dropper tool from here to sample a color from the jersey or you can simply use the Color Picker to choose your color. Press ok when you are done.
Something I didn’t do in the video tutorial that I should have, is to convert the Player layer to a Smart Object. Doing this, allows us to make non-destructive edits to the player. In the video, I just ran the Camera Raw Filter on the player moved on. So take that into consideration.
That being said, let’s convert the Player layer into a Smart Object by right clicking on the layer (PC) or Ctl+Click (Mac) and choosing Convert to Smart Object from the context menu.
Now, from the main menu, choose Filter > Camera Raw Filter to enter the Camera Raw workspace. This workspace is very similar to the functionality of the Light Room. We are using the Camera Raw Filter to make our subject more gritty feeling and to get the different textures and shadows to pop more. In this image, I will drop the Highlights and increase the Texture and Clarity. These settings will be different based on the image you are working with and the results you are looking for. Don’t be afraid to experiment here.
It’s time to add our light rays behind the player. There are different ways to accomplish this part. We are going to use a custom brush to create the Light Ray. Some of you don’t have these brushes but might have an overlay that you can use instead. If you don’t have either, you can experiment with the rectangle tool, adjust the shape, and use some masking and feathering and can get pretty similar results. In the tutorial video, I didn’t like the first light ray brush I used so I later removed it and added a new one.
So, click on the rectangle background layer and add a new layer above it. Use you brush tool to create a light ray behind the player or insert your overlay and make your adjustments. If you want to change the color of the light rays to match the jersey and background, then add a Hue/Saturation adjustment layer above the light ray layer. Right click (PC) on the Adjustment Layer or Ctl+Click (Mac) and choose Create Clipping Mask from the context menu. A clipped layer will only be visible within the boundaries of the layer it’s clipped into, also known as the “base” layer. A layer will become underlined, indicating that it is a base layer, once a separate layer is clipped into it. Once we have the Hue/Saturation layer setup as a clipping mask to the light ray layer, we can use it to adjust the color of the light ray.
Click on the the Hue/Saturation Layer, then in the Properties panel, check the box that says Colorize. Now adjust the sliders for Hue, Saturation and Lightness until you are satisfied.
Now that we have the light rays in place behind the player, let’s add some dust particles. We are going to use the same process we did with the light rays and use a custom brush. Add a new layer above the Hue/Saturation layer we just added. Rename this layer to dust. Similar to the light ray layer, we’ll brush on our dust or insert a dust overlay. Make any adjustments necessary until you achieve the desired look. In the tutorial video, I used the eraser tool to remove some of the dust that I brushed on just to clean it up a bit.
After you are done with the dust layer, let’s add a new layer above the dust layer and behind the player layer. Rename this layer ellipse. We are going to use the Ellipse tool from the Tool Bar and draw an ellipse. Hold the shift key while drawing the ellipse and it will keep it as a perfect circle instead of stretching it into an oblong shape. Once you have the ellipse drawn, make sure it’s somewhat centered between the shoulders, and directly behind the neck area. You can always come back later and reposition the ellipse if need be.
Once you have the ellipse positioned to where you like it, making sure the ellipse layer is still selected, choose the Masks icon from the Shape Properties section of the Properties Panel. Find the Feather option and move the slider to somewhere around 400. I set the feather on this to 421, but that number will be different based on the size of your image and the size of the ellipse you have drawn on the canvas. We are simply using the feathered ellipse to create and enhance the glowing effect behind the player. If the ellipse is too bright, simply reduce the opacity until you are happy. I reduced the opacity of this ellipse to 69%.
I want to do the same thing on the lower half of the player. Easiest way to do this is to duplicate the ellipse layer you just created and drag it down until it’s just around the waste line of the player. I don’t want it as bright on the lower half of the player, so I’ve reduced the opacity of this ellipse to 51%. Based on your image, experiment with the opacity and the sizing of the ellipse until you are happy.
For this next part, we are going to add some rim lighting to the player. Rim Lighting puts light around the edges of the subject and exposes any areas where the light would naturally fall. Since the lighting we are creating is mostly behind the upper body of our subject, we will concentrate most of the rim lighting in that area. There are multiple ways to add rim lighting. I’m going to show you a very simple way using a solid color adjustment layer and a mask.
Select your player layer. At the bottom of the layer panel, choose the Create New Fill or Adjustment Layer icon, then select the Solid Color option. Set the color to white and press ok.
Now you entire screen is white. Notice the mask icon on the Adjustment Layer is white. So the first thing we want to do is select the Mask icon on the Adjustment Layer and invert it. To invert it, press CTL+I (PC) or CMD+I (Mac) and it will turn black. Remember this when dealing with Masks -“White reveals, Black conceals”.
We only want the changes we make on adjustment layer to to show on the player. So the next thing we want to do is right click on the Solid Color Adjustment Layer and choose the Create Clipping Mask option. Once this is done, you will see all of the icons on the Adjustment layer have shifted over and a down facing arrow has appeared.
Now we can begin to create our rim lighting. Make sure to select the mask icon on the Adjustment Layer. Then select your brush tool from the tool bar. You will want to use a soft round brush for this. Set the brush hardness to 0% and reduce the size of the brush. We only want to brush on just a little bit around the edges, so make sure the brush isn’t too large.
In order to expose the underlying color from the mask, we need to make sure the brush color is set to white. This will reveal the adjustment layer over the player as we brush it on.
Look at the example above. I brushed over the player’s arm to expose the adjustment layer’s color. It is a solid white color and needs to be blended before we go over the entire image. To do this, let’s set the layer’s blend mode to Overlay. If it’s too bright, then reduce the opacity of the layer until you achieve the desired look. I reduced the opacity in this image to 58%.
Look at the image below. I used the brush and only painted over the edges of the player where the light would reach. I left the bat alone as it was already bright enough. If you find that you have painted too much in certain areas, just swap the brush color to black and paint over those areas. Then change the color back to white and try again.
For those of you not familiar with masking, looking at the image below. As you paint onto the adjustment layer, you will also see the areas you painted show on the mask icon.
Next, for some added depth and detail, we’re going to go over the player and enhance all of the creases and folds in the uniform as well as the batting gloves. For this we’re going to use the Burn tool -but we’re going to use it in a non-destructive way.
Create a new layer above the rim light adjustment layer. Then go to the main menu and choose Edit > Fill. The fill dialog will appear. set the Contents to 50% Gray and the Blending Mode to Normal and 100% then press OK. Now set the layer’s blending mode to Overlay. When you do this, you should no longer see the gray background color.
Now choose the Burn tool. Set the hardness to 0 and make the brush small -just big enough that it goes slightly covers the width of the creases. In the tool options set the Range to Shadows and the Exposure to 100%. Use the burn tool and brush over all of the creases and folds where there are shadows. This will intensify the shadows, creases and folds and help to make the subject pop off the screen.
So for the final touch, chose the Create New Fill or Adjustment Layer icon at the bottom of the Layers panel. Choose Color Lookup from the list. Go up to the Properties panel and choose Moonlight.3DL from the first drop down box. This is going to create a deep blue color overlay on the image.
I like the deep blue color here, but I want to lighten it up a bit on the player, but leave it visible everywhere else. So, click on the Mask Icon on the Color Lookup layer. Grab a soft round brush with a hardness of 0%, make sure the brush color is set to black, and reduce the opacity of the brush to around 46%. Now, use the brush to color over the player and slightly conceal the Color Lookup layer. If you remove too much, just change the brush color to black and paint back over the any areas you want to darken back up. Experiment with this until you are happy with the results.
The final product is shown below:
Where can you find the brushes that I used?
Dust Brushes can be found here – 68 Dust Brushes
Light Ray Brushes can be found here – Light Ray Brushes
Original Photo in this tutorial can be downloaded here 
Tell us about your thoughtsWrite message
You must be logged in to post a comment.